
Showing posts with label Candy Buffets Cincinnati. Show all posts
Showing posts with label Candy Buffets Cincinnati. Show all posts
Monday, December 5, 2011
Upcoming Candy Buffet
This Wednesday CandyShopBuffets will be doing a super sweet candy buffet for something very special! I will be making the finishing touches today and tomorrow and will be uploading pictures as soon as Thursday! The theme will be silver and metallic and just all over sparkly. Stay Tuned.... ;)
Wednesday, October 26, 2011
Halloween Candy Day #3
These are just too cute and pretty simple if you are good at making meringue!
Day #3- Meringue Ghosts :)

2. Turn the mixer to medium-high speed and beat until the egg whites are foamy. Turn the mixer off, add the cream of tartar, and continue beating on medium-high until the whites have turned an opaque white color and hold soft peaks.
3. At this point, start adding the powdered sugar a few spoonfuls at a time with the mixer running. Once all of the sugar has been added, add any extracts you are using and turn the mixer to high speed. Continue to beat the egg whites until they are very thick, glossy, and a shiny white color. When you stop the mixer and lift the whisk out of the whites, the whites should have a very stiff peak. This process will take about 7-12 minutes in a stand mixer.
4. Cover two baking sheets with parchment paper. Scoop your meringue mixture into a piping bag fitted with a ½ inch round tip, or if you don’t have this, into a large Ziploc bag with a ½ inch hole cut in the corner.
5. Pipe your meringue into ghost shapes about 1-1/2 inches wide and 2 inches tall. You can either do this by squeezing the bag and pulling up gradually, making one big “blobby” ghost, or by making a series of concentric circles spiraling upward. Pipe 12 ghosts onto each baking sheet, for a total of about 2 dozen meringue ghosts.
6. Bake the meringues in the preheated oven for an hour. After an hour, open the oven door and continue to cook for 30 minutes, then turn the oven off, close the door, and allow the meringues to sit until completely cool, about 1 hour.
7. Once the meringues are crisp and room temperature, melt the chocolate in a microwave-safe bowl, stirring after every 30 seconds to prevent overheating. If you want to coat the bottoms in crushed nuts, sprinkles, or toasted coconut as well, place those toppings in small, shallow bowls nearby.
8. Dip the bottoms of the ghosts in the melted chocolate, and scrape the bottoms against the lip of the bowl to remove excess chocolate. If you’re dipping them in other toppings, immediately press the bottom of the ghost into the bowl of toppings so they adhere to the wet chocolate. Replace the dipped ghost back on the baking sheet and repeat with remaining ghosts and chocolate. Dip a toothpick in the remaining melted chocolate and give each ghost two dots for eyes and, if you desire, a mouth or other features.
9. Refrigerate the ghosts to set the chocolate, about 5-10 minutes. Do not refrigerate them any longer than absolutely necessary, as they will absorb moisture from the refrigerator and lose their crispness. Store Meringue Ghosts in an airtight container at room temperature.
Credit: About.com
Day #3- Meringue Ghosts :)

Yield: 24 ghosts
Ingredients:
- 2 egg whites, room temperature
- 1/8 tsp cream of tartar
- 3/4 cup powdered sugar
- 1/2 tsp flavored extract, like vanilla or almond
- 8 oz semi-sweet chocolate
- toasted nuts, coconut, or sprinkles (optional)
Preparation:
1. Preheat the oven to 200 degrees. Place the room temperature egg whites in the clean bowl of a stand mixer fitted with a whisk attachment. (Alternately, you can use a large bowl and a hand mixer with whisk attachments.)2. Turn the mixer to medium-high speed and beat until the egg whites are foamy. Turn the mixer off, add the cream of tartar, and continue beating on medium-high until the whites have turned an opaque white color and hold soft peaks.
3. At this point, start adding the powdered sugar a few spoonfuls at a time with the mixer running. Once all of the sugar has been added, add any extracts you are using and turn the mixer to high speed. Continue to beat the egg whites until they are very thick, glossy, and a shiny white color. When you stop the mixer and lift the whisk out of the whites, the whites should have a very stiff peak. This process will take about 7-12 minutes in a stand mixer.
4. Cover two baking sheets with parchment paper. Scoop your meringue mixture into a piping bag fitted with a ½ inch round tip, or if you don’t have this, into a large Ziploc bag with a ½ inch hole cut in the corner.
5. Pipe your meringue into ghost shapes about 1-1/2 inches wide and 2 inches tall. You can either do this by squeezing the bag and pulling up gradually, making one big “blobby” ghost, or by making a series of concentric circles spiraling upward. Pipe 12 ghosts onto each baking sheet, for a total of about 2 dozen meringue ghosts.
6. Bake the meringues in the preheated oven for an hour. After an hour, open the oven door and continue to cook for 30 minutes, then turn the oven off, close the door, and allow the meringues to sit until completely cool, about 1 hour.
7. Once the meringues are crisp and room temperature, melt the chocolate in a microwave-safe bowl, stirring after every 30 seconds to prevent overheating. If you want to coat the bottoms in crushed nuts, sprinkles, or toasted coconut as well, place those toppings in small, shallow bowls nearby.
8. Dip the bottoms of the ghosts in the melted chocolate, and scrape the bottoms against the lip of the bowl to remove excess chocolate. If you’re dipping them in other toppings, immediately press the bottom of the ghost into the bowl of toppings so they adhere to the wet chocolate. Replace the dipped ghost back on the baking sheet and repeat with remaining ghosts and chocolate. Dip a toothpick in the remaining melted chocolate and give each ghost two dots for eyes and, if you desire, a mouth or other features.
9. Refrigerate the ghosts to set the chocolate, about 5-10 minutes. Do not refrigerate them any longer than absolutely necessary, as they will absorb moisture from the refrigerator and lose their crispness. Store Meringue Ghosts in an airtight container at room temperature.
Credit: About.com
Thursday, October 20, 2011
Halloween Candy!
So coming up, just around the corner, is Halloween! Spooky, scary, and sweet! From now until this anticipated and most frightful day, I will be posting a candy and treat recipe for you to try at home. Make them now, store them, and use these candies and treats to bring to your office party, halloween themed wedding, or a themed house party! Most candies or treats, if stored in a cool place, keep very well for months!
Day #1- Honey Carmel Corn Balls

Credit: www.delish.com
Day #1- Honey Carmel Corn Balls

Ingredients
- 6 tablespoon(s) (3/4 stick) butter
- 1/2 cup(s) sugar
- 1/2 cup(s) light brown sugar
- 3 tablespoon(s) honey
- 3 tablespoon(s) light corn syrup
- 3/4 teaspoon(s) baking soda
- 10 cup(s) (1 plain microwave bag or 1/4 cup kernels) popcorn, popped
- 2 teaspoon(s) fine sea salt
- 1 1/2 cup(s) honey-roasted peanuts (or other nuts)
Directions
- In a medium, heavy-bottomed saucepan, melt butter over medium heat. Add sugars, honey, and corn syrup and cook to 300° over medium-high heat, stirring occasionally. Mixture will be thick and bubbly. Add baking soda and stir carefully to incorporate.
- Remove any unpopped kernels from popcorn, then place in a lightly oiled bowl. Pour caramel over popcorn and toss to combine, using oiled, heatproof spatulas or wooden spoons. When popcorn has cooled slightly but is not quite set, mix in salt and peanuts. With oiled hands, form into 2-inch balls. Keep a bowl of cold water nearby to dip your hands into if mixture gets warm or sticky. Place balls on sheet tray; once cool, store in an airtight container. Eat within a week.
- Note: For perfectly shaped kernels, use the mushroom variety of popcorn, available at JustPoppin.com.
Credit: www.delish.com
Monday, September 26, 2011
Louisville Candy Buffet!

Here are some pictures, Enjoy :)


Friday, September 23, 2011
The Perfect Combo! Yum!

Link to Recipe!
Monday, July 25, 2011
Homemade Sweets!

Since starting blogging, I have been constantly on the hunt for candy recipes that are relatively easy to make at home. Kind of "fool-proof" recipes so that everyone can enjoy making desserts and candy!
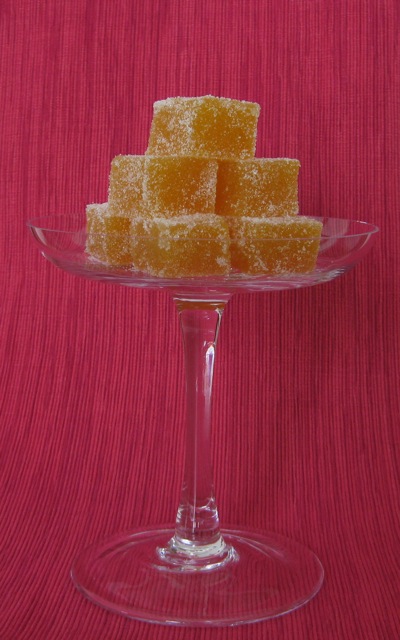
One such recipe I found recently was from a blog called "Not Without Salt". This recipe is archived and the type of candy is extremely popular with all of my candy buffets this year! It is called Apple Pate de Fruit. These candies are traditionally French and the consistency is much like hardened jam. Pate de Fruit, whichever fruit you choose is wonderfully chewy, and sugary; much like the fruit slices you buy at the grocery store.
Check out the full recipe at "Not Without Salt"!
Thursday, June 23, 2011
Ice Cream Treats!

 I, like so many other sweet people, am a big fan of ice cream in all its forms! I came across an amazing collection of recipes today that will serve up a delicious variety of frosty goodness.
 If you are not much of a baker, then these recipes are for you! Most of them require no baking, and the rest of the baking is pretty minimal.
You can serve these treats at family gatherings, birthday parties, etc... For these treats on a large scale though, I would recommend putting them on dry ice, to limit the melting!
Monday, June 6, 2011
"Sweet Sayings"
Every Candy Buffet should be sweet and personal; a reflection of you and your groom's personality and style! This means no two candy buffets should be the same and this goes for candy buffet sayings as well.
Here is a list I came up with, with the help of a few friends and other candy buffet ladies of "sweet sayings" for your candy buffet.
1. "All you need is Love..and Candy"
2. "Nothing is sweeter than our love!"
3. “Enjoy the sweetness!
- from the
new Mr. & Mrs”
4." Love is Sweet! Enjoy a Treat!"
5. "Serving you a
little treat, to say we think your pretty sweet!"
6." Love is Sweet!"
7. "Our love is as sweet as candy!"
8. " We would like to
thank you for joining us on our wedding day!
Before you
leave take a treat and always remember
….Love is
Sweet!"

There are so many more that you could use that are not listed here! Remember, if need something custom created for your event, please let your candy buffet lady know. We are always looking for new sayings and creative ways to incorporate them into your candy buffet!
Thursday, May 26, 2011
Decorative Paper Globes

This is another great idea for all you event
planners out there, or those of you hiring
event planners! Such a cool 3-D decorative
piece that will be sure to liven up your event.
These paper hanging globes have a tutorial on MarthaStewart.com and are really easy to make. Check it out here!
Subscribe to:
Posts (Atom)